Introduction
Ever since creating the WiFi post, I received several inquiries about using a custom SSID and password. In that past post, I had hardcoded the WiFi SSID and password. I figured its a sign for updating the code to demonstrate how to enter a custom access point SSID and password.
In this post, I will be updating the past WiFi post application code to accommodate custom network SSID entry. UART will be used to acquire user entry from the terminal.
📚 Knowledge Pre-requisites
To understand the content of this post, you need the following:
Basic knowledge of coding in Rust.
💾 Software Setup
All the code presented in this post is available on the apollolabs ESP32C3 git repo. Note that if the code on the git repo is slightly different then it means that it was modified to enhance the code quality or accommodate any HAL/Rust updates.
Additionally, the full project (code and simulation) is available on Wokwi here.
🛠 Hardware Setup
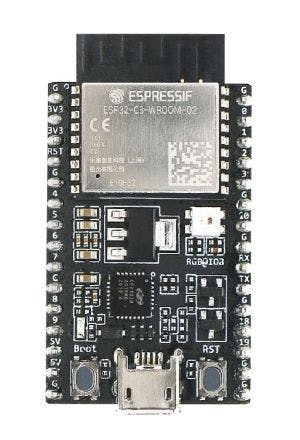
Materials
👨🎨 Software Design
In the past example, the ESP32 was configured in station mode in the following steps:
Configure WiFi
Start WiFi
Connect WiFi
(Optional) Confirm Connection and Check Connection Configuration
Ahead of these steps we'll need to capture the user entry and use it in the WiFi configuration. These are the additional steps that need to be taken ahead of connecting to WiFi:
Instantiate and Configure UART
Ask user for SSID
Read and store SSID
Ask user for password
Read and store password
After that we can proceed to configure WiFi with the stored entries.
👨💻 Code Implementation
📥 Crate Imports
In this implementation, the following crates are required:
The
anyhowcrate for error handling.The
esp_idf_halcrate to import the peripherals.The
esp_idf_svccrate to import the device services necessary for WiFi.The
heaplesscrate for the heaplessStringandVectypes.
use esp_idf_hal::delay::BLOCK;
use esp_idf_hal::gpio;
use esp_idf_hal::prelude::*;
use esp_idf_hal::uart::*;
use esp_idf_svc::eventloop::EspSystemEventLoop;
use esp_idf_svc::nvs::EspDefaultNvsPartition;
use esp_idf_svc::wifi::{AuthMethod, BlockingWifi, ClientConfiguration, Configuration, EspWifi};
use heapless::{String, Vec};
use std::fmt::Write;
🎛 Initialization/Configuration Code
1️⃣ Obtain a handle for the device peripherals: Similar to all past blog posts, in embedded Rust, as part of the singleton design pattern, we first have to take the device peripherals. This is done using the take() method. Here I create a device peripheral handler named peripherals as follows:
let peripherals = Peripherals::take().unwrap();
2️⃣ Configure & Instantiate UART: UART needs to be instantiated to use the same pins used for terminal logging. These are pins 20 and 21. This is similar to how UART was configured in the UART post:
// Configure UART
// Create handle for UART config struct
let config = config::Config::default().baudrate(Hertz(115_200));

// Instantiate UART
let mut uart = UartDriver::new(
    peripherals.uart0,
    peripherals.pins.gpio21,
    peripherals.pins.gpio20,
    Option::<gpio::Gpio0>::None,
    Option::<gpio::Gpio1>::None,
    &config,
)
.unwrap();
3️⃣ Acquire User Input: Following the UART configuration, the user is prompted to enter the SSID as shown below. Following that, the SSID is captured by entering a loop where a character is read one at a time using the UART driver read method. Note the following:
Each character entered is echoed to the console using the
writemethod. This is so that the user has visual confirmation that the intended character is entered. In the case of password entry, an asterisk (ascii value 42) is echoed instead of the actual entry.Each character that is acquired is appended/buffered in the
ssidandpasswordvectors using theextend_from_sliceVecmethod.Every time a character is read, the code checks if its a carriage return (ascii value 13). If it is then the code breaks out of the loop.
Both
ssidandpasswordareheapless::Vectypes.
uart.write_str("Enter Network SSID: ").unwrap();

// Read and Buffer SSID
let mut ssid = Vec::<u8, 32>::new();
loop {
    let mut buf = [0_u8; 1];
    uart.read(&mut buf, BLOCK).unwrap();
    uart.write(&buf).unwrap();
    if buf[0] == 13 {
        break;
    }
    ssid.extend_from_slice(&buf).unwrap();
}

uart.write_str("\nEnter Network Password: ").unwrap();

// Read and Buffer Password
let mut password = Vec::<u8, 64>::new();
loop {
    let mut buf = [0_u8; 1];
    uart.read(&mut buf, BLOCK).unwrap();
    uart.write(&[42]).unwrap();
    if buf[0] == 13 {
        break;
    }
    password.extend_from_slice(&buf).unwrap();
}
4️⃣ Adjust Buffered Types: Both ssid and password are Vec types. The WiFi configuration however accepts a heapless::String type. As such, the acquired values need to be adjusted such that the types are compatible as follows:
let ssid: String<32> = String::from_utf8(ssid).unwrap();
let password: String<64> = String::from_utf8(password).unwrap();
5️⃣ Obtain handle for WiFi: this involves the same steps that were done in the WiFi post.
let sysloop = EspSystemEventLoop::take()?;
let nvs = EspDefaultNvsPartition::take()?;
let mut wifi = EspWifi::new(peripherals.modem, sysloop, Some(nvs))?;
6️⃣ Configure the WiFi Driver: now that we have the ssid and password we can proceed to configure the wifi driver as follows:
wifi.set_configuration(&Configuration::Client(ClientConfiguration {
    ssid: ssid,
    bssid: None,
    auth_method: AuthMethod::None,
    password: password,
    channel: None,
}))?;
This is it for configuration! Let's now jump into the application code.
📱 Application Code
Start and Connect Wifi: Now that wifi is configured, all we need to do is start it and then connect to a network:
// Start Wifi
wifi.start()?;

// Connect Wifi
wifi.connect()?;

// Wait until the network interface is up
wifi.wait_netif_up()?;

println!("Wifi Connected");

loop {}
This is it!
📱Full Application Code
Here is the full code for the implementation described in this post. You can additionally find the full project and others available on the apollolabs ESP32C3 git repo. Also, the Wokwi project can be accessed here.
use esp_idf_hal::delay::BLOCK;
use esp_idf_hal::gpio;
use esp_idf_hal::prelude::*;
use esp_idf_hal::uart::*;
use esp_idf_svc::eventloop::EspSystemEventLoop;
use esp_idf_svc::nvs::EspDefaultNvsPartition;
use esp_idf_svc::wifi::{AuthMethod, BlockingWifi, ClientConfiguration, Configuration, EspWifi};
use heapless::{String, Vec};
use std::fmt::Write;

fn main() -> anyhow::Result<()> {
    // Take Peripherals
    let peripherals = Peripherals::take().unwrap();
    let sysloop = EspSystemEventLoop::take()?;
    let nvs = EspDefaultNvsPartition::take()?;

    // Configure UART
    // Create handle for UART config struct
    let config = config::Config::default().baudrate(Hertz(115_200));

    // Instantiate UART
    let mut uart = UartDriver::new(
        peripherals.uart0,
        peripherals.pins.gpio21,
        peripherals.pins.gpio20,
        Option::<gpio::Gpio0>::None,
        Option::<gpio::Gpio1>::None,
        &config,
    )
    .unwrap();

    let mut wifi = BlockingWifi::wrap(
        EspWifi::new(peripherals.modem, sysloop.clone(), Some(nvs))?,
        sysloop,
    )?;

    // This line is for Wokwi only so that the console output is formatted correctly
    uart.write_str("\x1b[20h").unwrap();

    uart.write_str("Enter Network SSID: ").unwrap();

    // Read and Buffer SSID
    let mut ssid = Vec::<u8, 32>::new();
    loop {
        let mut buf = [0_u8; 1];
        uart.read(&mut buf, BLOCK).unwrap();
        uart.write(&buf).unwrap();
        if buf[0] == 13 {
            break;
        }
        ssid.extend_from_slice(&buf).unwrap();
    }

    uart.write_str("\nEnter Network Password: ").unwrap();

    // Read and Buffer Password
    let mut password = Vec::<u8, 64>::new();
    loop {
        let mut buf = [0_u8; 1];
        uart.read(&mut buf, BLOCK).unwrap();
        uart.write(&[42]).unwrap();
        if buf[0] == 13 {
            break;
        }
        password.extend_from_slice(&buf).unwrap();
    }

    let ssid: String<32> = String::from_utf8(ssid).unwrap();
    let password: String<64> = String::from_utf8(password).unwrap();

    wifi.set_configuration(&Configuration::Client(ClientConfiguration {
        ssid: ssid,
        bssid: None,
        auth_method: AuthMethod::None,
        password: password,
        channel: None,
    }))?;

    // Start Wifi
    wifi.start()?;

    // Connect Wifi
    wifi.connect()?;

    // Wait until the network interface is up
    wifi.wait_netif_up()?;

    println!("Wifi Connected");

    loop {}
}
Conclusion
This post introduced how to configure and connect ESP Wifi in station mode using Rust and the esp_idf_svc crate. This code is modified from a past WiFi example allowing a user to enter an SSID and password instead of hardcoding them. This avoids having to recompile the code every time the WiFi station needs to be changed. Have any questions? Share your thoughts in the comments below 👇.
About the author
- I am an 📟 Embedded Engineer with years of experience in both industry 🏭 and academia 🏫. Passionate Mentor 👨💼 and Instructor 👨🏫. Rustacean 🦀
Comments
Join the discussionNo comments yet. Be the first to comment.